Go の開発環境を作る
Go の開発環境について、調べた内容を纏めておきます。
環境
- Windows 11 Pro
- Ubuntu 20.04.4 LTS(WSL2)
- Go 1.19.1
- Visual Studio Code 1.71.2
- Go for Visual Studio Code v0.35.2
Go のインストール先は WSL 上の Ubuntu となります。利用するエディタは VS Code です。
Go のインストール
公式ドキュメントを参考に、Go を Ubuntu に インストールします。
ダウンロード。
$ wget https://go.dev/dl/go1.19.1.linux-amd64.tar.gz
旧環境を削除してからインストール。
$ sudo rm -rf /usr/local/go
$ sudo tar -C /usr/local -xzf go1.19.1.linux-amd64.tar.gz
プロファイルに Go の PATH を追加。
$ echo 'export PATH="$PATH:/usr/local/go/bin"' >> ~/.bash_profile
$ source ~/.bash_profile
確認。
$ go version
go version go1.19.1 linux/amd64
プロジェクトを作成してコードを実行
サンプルコードを書いて実行してみます。下記が参考のチュートリアル。
新規プロジェクト用のディレクトリを作成。
$ mkdir ~/sample
$ cd ~/sample
go module の初期化。Go における モジュール の概念については後述。
$ go mod init sample
go: creating new go.mod: module sample
実行するコードを用意。
ファイル構成
sample
├── double
│   └── double.go
├── go.mod          # このファイルは go mod init 時に自動作成される
└── main.go
sample/main.go
package main

import (
    "fmt"
    "sample/double"
)

func main() {
    fmt.Println(double.Double(2))
}
sample/double/double.go
package double

func Double(x int64) int64 {
    return x * 2
}
実行。
$ cd ~/sample
$ go run .
4
コンパイルだけ実行。
$ cd ~/sample
$ go build .
$ ls -l sample
-rwxr-xr-x 1 zunda zunda 1814702 Sep 29 14:20 sample
$ ./sample
4
モジュールとパッケージとは
モジュール とは、パッケージ の集合であり、Git で管理されるリポジトリの単位のこと。go.mod ファイル内に記述された module path により定義されている。
A
moduleis a collection of packages that are released, versioned, and distributed together. Modules may be downloaded directly from version control repositories or from module proxy servers.A module is identified by a module path, which is declared in a
go.modfile, together with information about the module’s dependencies. The module root directory is the directory that contains thego.modfile. The main module is the module containing the directory where thegocommand is invoked.
パッケージ とは、同一ディレクトリに存在するソースファイルたちを指すもの。Go における名前空間、みたいな理解でいいのだろうか。ソースコード内冒頭の package 式で宣言されている。
Each package within a module is a collection of source files in the same directory that are compiled together. A package path is the module path joined with the subdirectory containing the package (relative to the module root).
Modules, packages, and versions
「1ディレクトリ=1パッケージ」となるので、ディレクトリ名と同一のパッケージ名とするのが慣例であるが、ディレクトリ名とパッケージ名を異なる名前としても動くらしい。また、main パッケージ 内にある main 関数 が、Go プログラムのエントリーポイントとなる、とのこと。
A complete program is created by linking a single, unimported package called the main package with all the packages it imports, transitively. The main package must have package name main and declare a function main that takes no arguments and returns no value.
Program execution begins by initializing the main package and then invoking the function main. When that function invocation returns, the program exits. It does not wait for other (non-main) goroutines to complete.
go.mod ファイルとは
go mod init コマンド実行時のモジュール初期化時に、モジュールのルートディレクトリ内に作成されます。今回の場合、ファイル内記述は下記。
sample/go.mod
module sample

go 1.19
用意されている設定たち。
- module directive
- go directive
- require directive
- exclude directive
- replace directive
- retract directive
設定されている module path や、Go のバージョン、ソースコード内で利用する 3rd party パッケージのバージョン等が定義されるようです。
go mod コマンドにて操作するとのこと。
$ go help mod
Go mod provides access to operations on modules.

Note that support for modules is built into all the go commands, not just 'go mod'.
For example, day-to-day adding, removing, upgrading,and downgrading of dependencies should be done using 'go get'.
See 'go help modules' for an overview of module functionality.

Usage:

        go mod <command> [arguments]

The commands are:

        download    download modules to local cache
        edit        edit go.mod from tools or scripts
        graph       print module requirement graph
        init        initialize new module in current directory
        tidy        add missing and remove unused modules
        vendor      make vendored copy of dependencies
        verify      verify dependencies have expected content
        why         explain why packages or modules are needed

Use "go help mod <command>" for more information about a command.
VS Codeの拡張
Go の開発チームが作ってくれている Extension があり、これを利用すれば問題ないようです。
下記がインストール方法。
Go 開発用に Visual Studio Code を構成する
フォーマッター
Go には gofmt というフォーマッター用のコマンドが標準で用意されている。検査したいファイルを指定して実行すると、フォーマットされたコードを出力してくれます。
Gofmt formats Go programs. It uses tabs for indentation and blanks for alignment. Alignment assumes that an editor is using a fixed-width font.
Without an explicit path, it processes the standard input. Given a file, it operates on that file; given a directory, it operates on all .go files in that directory, recursively. (Files starting with a period are ignored.) By default, gofmt prints the reformatted sources to standard output.
その他、準標準ライブラリで goimports があり、これは gofmt のスタイルの他、import 文部分のフォーマットをしてくれます。
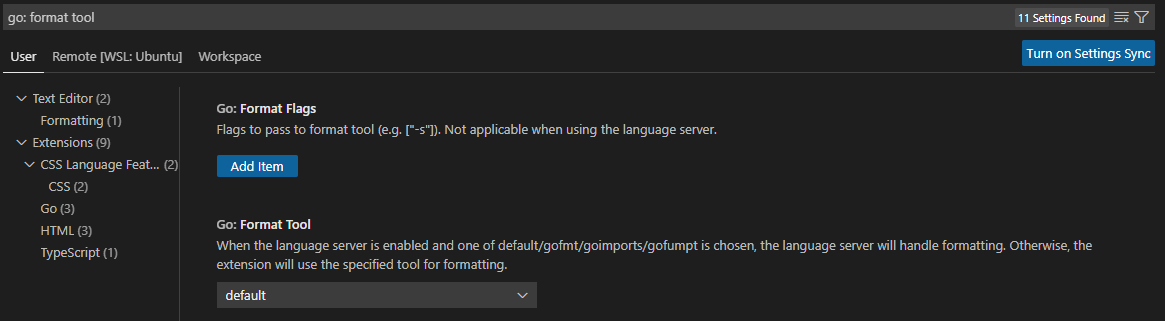
VS Code の Extension では標準でフォーマッターが有効となっており、ファイル保存時に自動的に変換してくれます。デフォルトで利用しているスタイルが分かりにくかったのですが、Go の標準 language server である gopls のデフォルトが goimports であるため、おそらく goimports を利用しているものと考えています。
ここで変えられます。
local is the equivalent of the
goimports -localflag, which puts imports beginning with this string after third-party packages. It should be the prefix of the import path whose imports should be grouped separately.
リンター
リンターにおいても、go vet というコマンドが標準で用意されています。
例えば、以下のようにコードを変更してみます。double.Double 関数の引数を変更。
sample/main.go
package main

import (
    "fmt"
    "sample/double"
)

func main() {
    fmt.Println(double.Double("2")) // 引数を文字型にする
}
go vetを実行してみる。
$ go vet .
# sample
vet: ./main.go:9:28: cannot use "2" (untyped string constant) as int64 value in argument to double.Double
VS Code の Extension では staticcheck という 3rd party のパッケージがデフォルトで有効となっています。

リンターのライブラリは幾つかあるようですが、何が良いかなんてまるで分からず、以下はサイボウズさんの技術ブロクより。
その中でYakumoチームではstaticcheckを採用しました。 採用理由は、staticcheckはデフォルト設定でも程よいルールが適用され、golintほど過剰な指摘がないという点です。 またstaticcheckはGoogleが公式でスポンサーをしており、社内のNecoチームがすでに利用していたというのも理由の1つです。
ここで挙げたツールとgolintは、指摘内容が異なる点に注意する必要があります。 これらのツールはバグとなりうるコードを指摘するのに対して、golintはスタイルチェッカーです*1。 例えばgolintはexportされた関数へのドキュメントコメントを強制しますが、staticcheckではデフォルトでそのチェックが無効になっています。 またstaticcheckは、err確認漏れ (
if err != nil)を指摘してくれますが、golintにはその機能がありません。
Goの静的解析ツールをgolintからstaticcheckに移行した話
とりあえず、こんな感じで。気づいた都度、追記していくかもです。